
Waitlister
Add a Waitlister form to a post or page, and see your sign-ups in the EmDash dashboard.
@waitlister.me/waitlisterOr open Registry in your EmDash admin and search for this name.
Overview
Waitlister is waitlist software for launching a product: a signup page, referral rewards and emails to your list in one tool, free to start. This plugin connects your Waitlister account to EmDash, so you can put a waitlist form on a post or page and see your numbers in the admin.
What it does
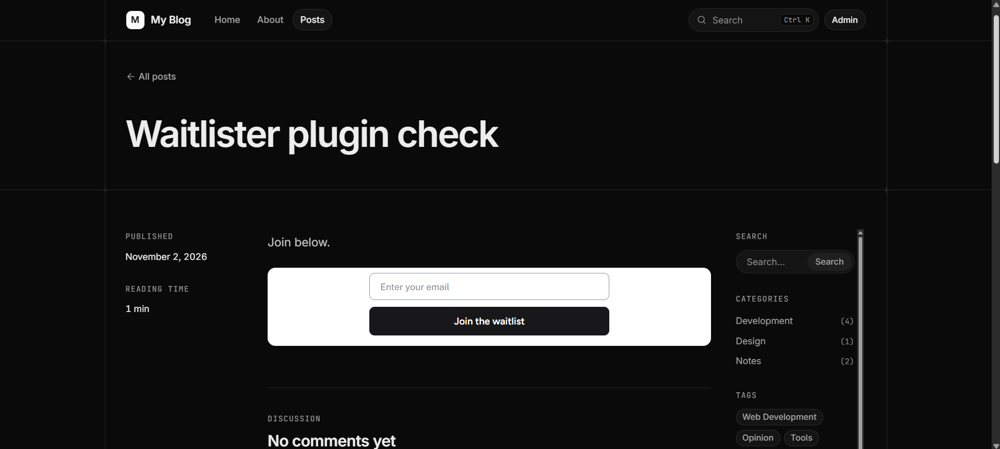
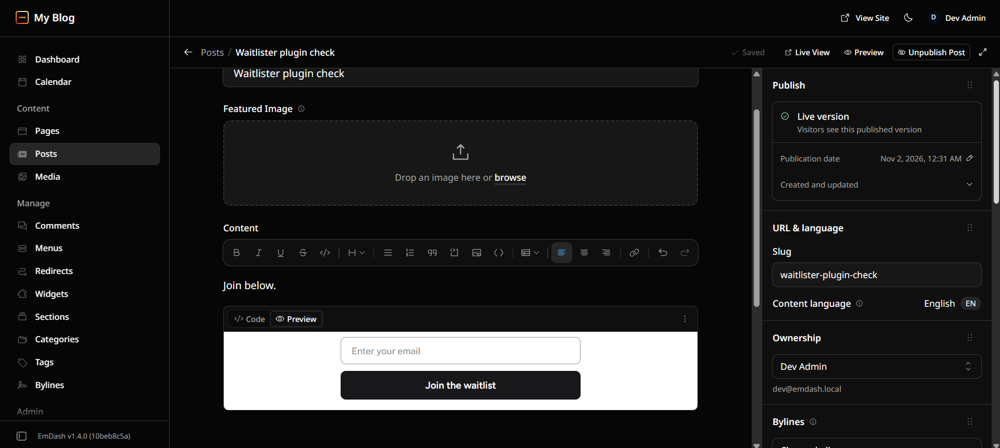
- Open a saved entry, pick a waitlist in the Waitlist form panel, and copy the embed code. Paste it into an EmDash Iframe block. If the waitlist has no form yet, the panel tells you first.
- A dashboard widget and an admin page show sign-ups and views across your waitlists.
- If a waitlist has referrals on, the panel warns you when you get the code. The Waitlister page in your EmDash admin shows how to keep referrals working.
You design the form in Waitlister and manage sign-ups, emails and referrals there.
Screenshots
Permissions
Plugins get only the capabilities they declare and you approve. Your EmDash admin lists these again before anything installs.
FAQ
Does it work on the Free plan?
Yes. Embeddable forms and account API keys are on every Waitlister plan.
Why an iframe?
EmDash doesn't let registry plugins add scripts or custom blocks to public pages, so the form goes in EmDash's built-in Iframe block.
What's different from the script embed?
- Referrals: an iframe can't read
?ref=from the page URL, so a friend who arrives from a referral link joins without crediting the person who shared it. - Height: the form keeps the height you set (edit
heightin the block's Code tab) and scrolls if it needs more room. The script embed resizes itself. - Custom sign-up redirect: the redirect page opens in a new tab. With the script embed, the whole page goes there.
How do I keep referrals working?
Use the script embed in your theme instead of the Iframe block:
<script src="https://waitlister.me/js/embed.js" defer></script>
<div class="waitlister-form" data-waitlist-key="YOUR-WAITLIST-KEY"></div>
The Waitlister page in your EmDash admin shows this snippet with your newest waitlist's key. For another waitlist, use the key from its embed code, the part after /form/.
Or keep the Iframe block and set the Referral share URL in your waitlist's settings to your published Waitlister landing page, so friends join there.
What does the plugin read from my account?
Your username, plan, waitlist names, sign-up and view totals, and whether referrals are on. It doesn't read subscriber details. People who sign up send their details straight to Waitlister through the form.
Why don't I see the panel?
It appears on saved entries, so save a new entry first. You can also copy embed codes from the Waitlister page in your EmDash admin.
Does it work with every template?
It works wherever you can add an Iframe block. Pages in the Marketing template use a different field type, so use the script embed in your theme instead.
Security
Report security issues through the Waitlister contact form.
The plugin only talks to waitlister.me, and its API calls only read data. It has no permission to read or change your site's content.
EmDash encrypts your API key. Disconnect on the Waitlister page in EmDash removes it from your site. To cancel the key itself, revoke it under API keys in Waitlister.
Changelog
0.1.0
First release: connect an account, get an embed code for a post or page, and see sign-ups in the dashboard.
Installation
Your site needs:
- EmDash 1.4.0 or later.
- A sandbox runner, which every registry plugin requires. On Cloudflare that means the Workers Paid plan and a
LOADERbinding. EMDASH_ENCRYPTION_KEY, so EmDash can encrypt your API key. If you don't have one, runnpx emdash secrets generateand set the printed value as a Worker secret or environment variable.
Then:
- Open Registry in your EmDash admin, install Waitlister and accept its one permission: network access to
waitlister.me. - Create a Waitlister account if you don't have one (free, no credit card). Then create an account API key under API keys in your account menu. It starts with
wl_acct_and works on every plan, including Free. - In EmDash, open Waitlister in the admin menu, paste the key and click Connect.
- If you don't have a waitlist with a form yet, create one in Waitlister and build the form under Form.
- Open a saved post or page, find the Waitlist form panel, pick a waitlist and click Get embed code. Copy the code.
- In the entry, type
/iframewhere you want the form, then paste the code into the block's Code tab. Publish the entry when you're ready.
Keep exploring
More plugins like Waitlister
Browse by keyword, or see everything @waitlister.me publishes.